Canva to WordPress – How to Publish content
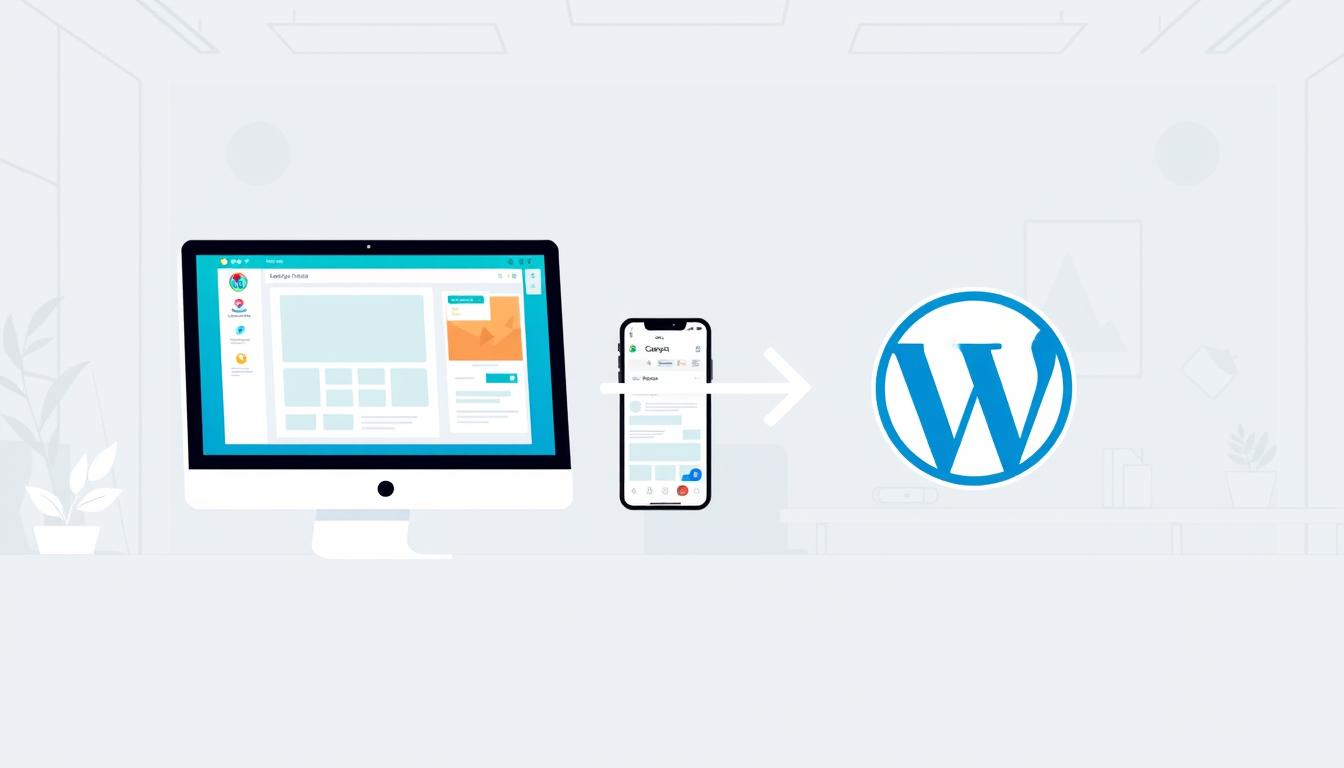
Table of Content
-
Author

-
Published
05 Nov 2025
-
Reading Time
48 mins
You’ve spent hours on your design, picking colours that show your brand. Then, the hard part starts—putting it on your website without losing quality. We know how this can slow down your content plans.
But, moving your designs from Canva to WordPress is easy. We’ve found simple ways to do this, whether it’s one post or a big campaign. This guide shares what we’ve learned to help Australian businesses.
There are many ways to publish content quickly, from simple image exports to full solutions. We’ll show you each method step by step. You’ll learn tips to save time and keep your design looking great. Your online presence deserves content that looks as good on your website as it does in your design platform.
Key Takeaways
- There are many ways to move designs between platforms, each for different content and workflows.
- Choosing the right export settings keeps your visuals sharp and fast-loading on your site.
- Knowing your file formats helps pick the best for images, graphics, and complex designs.
- Efficient processes save lots of time each week for regular content.
- You don’t need technical skills—simple steps make it easy for everyone.
Why Transfer Your Canva Designs to WordPress
Combining Canva’s visual power with WordPress’s publishing strength solves many business challenges. Australian businesses have seen big changes by linking these two platforms. This integration isn’t just for ease—it’s for a content workflow that grows with your business.
The real question is how fast you can start using these tools. Your competitors are already seeing the benefits, and the gap is growing. Every day you wait, you fall further behind.
Benefits of Combining Canva’s Design Power with WordPress
Mixing Canva’s easy design with WordPress’s strong content system gives you the best of both. Canva offers thousands of professionally designed templates that anyone can use. WordPress gives you SEO, organisation, and publishing flexibility for professional sites.
This mix removes the usual delay between design and publishing. No more waiting for files or dealing with external contractors.
Design benefits go beyond just graphics. Businesses can create visual content libraries in Canva and use them on WordPress instantly. Your brand stays consistent, and your publishing schedule stays on track.
Here’s what this integration brings to your content strategy:
- Immediate publishing capability without file conversion delays
- Complete control over your visual content without designer dependencies
- Consistent brand presentation across all digital channels
- Flexible editing that adapts to market changes and audience feedback
- Scalable content production as your business grows
Time and Cost Savings for Content Creators
Efficient content creation saves a lot of money. Traditional workflows involve hiring specialists, waiting for revisions, and managing software subscriptions. Businesses spend $500 to $2,000 monthly on design services.
Canva’s pricing changes this. Their free tier is great for small businesses. The Pro subscription costs about $17.99 AUD monthly, much less than Adobe Creative Cloud or freelance designers.
Time savings are even more valuable than cost savings. Content creators who used to take 2-3 days now do the same work in under an hour. This means you can quickly respond to market trends, publish timely content, and keep a consistent schedule without burnout.
We’ve seen these improvements in our clients:
- Content production time reduced by 60-70% on average
- Design iteration cycles shortened from days to minutes
- Monthly content output increased by 40% with existing resources
- Design costs decreased by up to 80% compared to traditional methods
Your team’s productivity soars because they’re creating value, not struggling with software or waiting for others.
Professional Results Without Design Experience
Professional design is now accessible to everyone. You don’t need years of training or artistic talent to enhance your brand. Canva’s templates and WordPress provide the platform for your designs.
We’ve helped business owners who’d never used design software before. They were creating graphics that matched or exceeded agency work in weeks. This confidence changes how businesses approach content.
Professional results come from design principles, not complex tools. Canva’s templates already use colour theory, typography best practices, and visual hierarchy. You’re applying proven design frameworks.
WordPress makes these professional results even better. Your Canva designs look great, load fast, and fit your content strategy perfectly. The technical stuff is handled for you, so you can focus on your message and audience.
This means your whole team can help with content. Marketing, customer service, and experts can all create on-brand visuals. Your content calendar becomes more flexible, your response time improves, and your publishing consistency gets stronger.
Understanding the Canva to WordPress Integration Process
We’ve helped many Australian businesses learn how to use Canva and WordPress together. It’s easy and doesn’t need complicated tech skills or expensive tools. You just need to know the basic steps and pick the best method for your needs.
Using Canva to add designs to your WordPress site is easy. We’ll show you what happens when you move content, what tools you need, and what types of content you can share.
How the Transfer Process Works
The process to move Canva designs to WordPress is simple. First, you create your design in Canva using their tools and templates. Then, you export it in a format WordPress can use. Lastly, you upload it to your WordPress site.
You can choose how to integrate your designs. Some like the manual export method for full control. Others prefer plugins that link Canva and WordPress for a smoother process.
This method is flexible. You can change how you do things based on your project needs. Knowing all your options helps you make better choices.
What You’ll Need Before Getting Started
Before you start, gather what you need. Having these things ready saves time and avoids problems later.
Here’s what you need:
- An active Canva account (free or Pro version both work)
- Access to your WordPress dashboard
- A WordPress site updated to version 5.0 or higher
- Enough hosting space for your media files
- Basic knowledge of your WordPress theme’s image sizes
- A clear idea of where your content will go
Your hosting should support JPG, PNG, and PDF files. Also, check your hosting’s file size limit. If you need to upload big files, you might need to increase this limit.
Having a plan for your content makes the process smoother. Decide what you’re creating, like images or headers, before you start.
Different Content Types You Can Publish
You can publish many types of visual content with Canva and WordPress. We’ve helped our Australian clients with everything from simple graphics to complex documents.
Here are some common content types you can move from Canva to WordPress:
- Featured images for blog posts – eye-catching headers that appear at the top of articles
- Social media graphics – repurposed promotional content for web pages
- Infographics and data visualisations – complex information presented visually
- Website banners and hero images – large promotional graphics for landing pages
- Email newsletter headers – branded graphics for email campaigns
- Presentation slides – converted to visual content for service pages
- Product mockups and promotional materials – ecommerce visuals
- Event posters and announcements – converted for blog posts or pages
Each content type might need different settings and placement on your WordPress site. For example, images need specific sizes, while infographics should be high-resolution PNGs for clarity.
Knowing these basics before you start will help you avoid common problems. We’ve seen many creators struggle because they didn’t plan properly before diving into the technical steps.
Preparing Your Canva Designs for WordPress Publishing
Proper Canva design preparation is key to professional WordPress content. Optimising your designs before exporting to WordPress prevents quality issues. It also reduces loading times and enhances the visitor experience.
Design preparation meets technical needs that affect your website’s performance and look. Rushing this step can lead to frustrating revisions later.
Your WordPress theme has specific design requirements. We’ll guide you through essential steps to make your designs website-ready.
Selecting Appropriate Dimensions for Your Website
Choosing the right dimensions for your Canva designs ensures they look great on all devices. Start by checking your WordPress theme’s documentation for recommended image sizes.
Featured images work best at 1200×630 pixels. This size looks good on most WordPress themes and keeps quality when shared on social media. Your featured images represent your content in feeds and previews, making proper sizing key.
Blog post images usually look best at 1200×800 pixels. This size offers great visual impact without making your website slow.
Full-width hero images need larger dimensions for sharpness on wide screens. We suggest 1920×1080 pixels or higher, depending on your theme’s needs.
Here are standard dimensions for common WordPress content types:
- Blog thumbnails: 600×400 pixels for grid layouts
- Sidebar graphics: 300×250 pixels or 300×600 pixels
- Social sharing images: 1200×630 pixels for optimal Facebook and LinkedIn display
- Instagram content: 1080×1080 pixels for square posts, 1080×1350 pixels for portrait
- Header banners: 1920×400 pixels for full-width designs
Always design at the exact dimensions you’ll use on your website. Scaling images up creates pixelation, while scaling down wastes file size and bandwidth.
Choosing the Right File Format for Export
Your file format choice affects both visual quality and website performance. Each format has its own purpose in your design preparation workflow.
PNG files preserve transparency and deliver superior quality for graphics containing text or sharp edges. Use PNG format when designs include your logo, text overlays, or elements that need transparent backgrounds. The trade-off is larger file sizes that can affect page loading speed.
JPG files are best for photographs and complex images where file size matters more than transparency. This format compresses images efficiently, making it ideal for blog post photos and detailed graphics.
Consider these file formats for different content types:
- PNG: Logos, icons, graphics with text, designs requiring transparency
- JPG: Photographs, complex illustrations, full-colour images without transparency
- PDF: Downloadable resources, multi-page documents, print materials
- SVG: Simple graphics that need to scale infinitely (requires WordPress plugin support)
We recommend exporting the same design in multiple file formats when unsure which will perform best. Test both versions on your WordPress site to compare quality and loading speed.
Remember, you can compress images after export to reduce file sizes further. But starting with the right format prevents quality loss during compression.
Organising Design Elements and Layers
Proper organisation in Canva streamlines your design preparation and simplifies future updates. We’ve found that structured designs save significant time when managing multiple WordPress content pieces.
Group related design elements together using Canva’s grouping function. This organisation allows you to move, resize, or adjust multiple elements at once. When you need to update a design, grouped elements maintain their relationships and proportions.
Name your layers descriptively instead of using Canva’s default names. Clear naming helps you quickly locate specific elements when making revisions or creating design variations.
Implement these organisation strategies in your Canva workspace:
- Create folders within Canva to categorise designs by purpose, campaign, or content type
- Use consistent naming conventions across all designs (e.g., “BlogPost_FileName_Date”)
- Lock background elements to prevent accidental movement during editing
- Arrange layers in logical order from background to foreground
- Delete unused elements before exporting to reduce file complexity
We suggest creating master templates for recurring content types. These templates include pre-organised layers and elements that you can duplicate and customise quickly.
Document your layer organisation system in a shared reference guide. This documentation proves invaluable when team members collaborate on WordPress content creation.
Ensuring Brand Consistency Across Platforms
Maintaining consistent branding between your Canva designs and WordPress website builds recognition and professionalism. Establish clear brand standards before exporting Canva to WordPress regularly.
Create and save your brand colours in Canva’s brand kit feature. This ensures you use identical colour codes across all designs. Colour consistency strengthens brand identity and creates visual cohesion throughout your WordPress content.
Upload your brand fonts to Canva Pro if you’re using custom typefaces. Font consistency matters as much as colour coordination. When your custom fonts aren’t available in Canva’s free version, select web-safe alternatives that closely match your brand typography.
Develop a detailed style guide document that includes:
- Exact colour codes (HEX, RGB values) for primary and secondary brand colours
- Font specifications including family names, weights, and size guidelines
- Logo usage rules and minimum size requirements
- Spacing and layout standards for different content types
- Image style preferences (photography vs. illustration, colour vs. black and white)
We create reusable Canva templates for each WordPress content category. These templates incorporate your brand standards and reduce the risk of inconsistency.
Reference your style guide whenever you prepare designs for WordPress. This habit ensures every piece of content reinforces your brand identity instead of diluting it through variations.
Regular brand audits help identify inconsistencies before they become widespread. Review your published WordPress content quarterly to verify that your Canva designs maintain brand standards across your entire website.
Step-by-Step: Export Canva to WordPress Website as Images
We’ve helped hundreds of Australian businesses export Canva designs to WordPress. The image method is the best for quality and control. It works every time, keeping your designs perfect from Canva to your WordPress pages.
Whether it’s a hero banner or a blog image, these six steps are foolproof. We’ve perfected this method for all kinds of images.
Finalise and Review Your Canva Design
Before downloading, we check your design’s quality. This step prevents mistakes and keeps your content professional.
Zoom your Canva design to 100% magnification to see how it will look on your website. At this size, text and alignment issues are clear.
Check these important things during your review:
- Spelling and grammar: Check all text carefully, as spell-checkers miss some
- Visual alignment: Make sure elements fit within the canvas without cropping
- Colour accuracy: Verify colours match your brand
- Image resolution: Ensure photos are sharp without pixelation
- Text hierarchy: Check that text sizes and styles are correct
It’s a good idea to view your design on another device or ask a colleague for feedback. Fresh eyes can spot things you’ve missed.
Access the Download Options
Once you’re happy with your design, finding Canva’s download feature is easy. It’s right there for you.
Click the “Share” button in the top-right corner of Canva. This button is always there, no matter what tool you’re using.
From the dropdown menu, choose “Download”. This opens a panel where you can set up your export.
Select Your Export Settings
This step is key for quality. The file format and settings you choose affect how your image looks and performs.
You can choose PNG, JPG, or PDF. Each has its own use. Here’s a comparison to help you decide:
| File Format | Best Use Cases | Quality Characteristics | File Size Considerations |
|---|---|---|---|
| PNG | Graphics with text, logos, images requiring transparency, designs with sharp edges | Lossless compression maintains perfect quality; supports transparent backgrounds | Larger files (typically 2-5x larger than JPG); may require compression for web use |
| JPG | Photographs, complex images without transparency, background images, hero banners | Lossy compression with minimal visible quality loss at high settings | Smaller files ideal for web; significantly faster loading times |
| Multi-page documents, downloadable resources, print materials | Maintains vector elements where possible; preserves text selectability | Variable size depending on content; often larger than single-page image formats |
For most WordPress uses, we suggest PNG for designs with text or transparency, and JPG for photos. Always choose the highest quality setting unless file size is a problem.
Canva Pro users get extra options like custom dimensions and background removal. If you need to resize, use the “Resize” feature to fit your WordPress theme.
Download the Design File
With your settings chosen, downloading is quick. Organising your files properly saves time later.
Click the “Download” button at the bottom of the settings panel. Canva will prepare your design according to your settings, usually in seconds.
Save the file in a dedicated folder structure on your computer. Organise folders like “WordPress Content > Blog Images > Month-Year” or “Website Assets > Hero Banners”. This makes finding files easy.
Name your file clearly with relevant keywords. Instead of “Canva-Design-123.png”, use “summer-sale-hero-banner.png” or “blog-featured-digital-marketing.png”. This helps your workflow and SEO.
Upload to WordPress Media Library
Your design file needs to get to WordPress. The media library is where you store your images.
Log into your WordPress dashboard and go to Media > Add New from the left menu. This takes you to the image upload area.
You have two easy ways to upload:
- Drag and drop: Drag your file from your computer folder into the upload area
- Browse and select: Click “Select Files” to open your file browser, find your design, and double-click to upload
WordPress will automatically create different sizes of your image. This usually happens quickly for standard images.
Once uploaded, your design will appear in the media library with a preview. You can click on it to view details, edit metadata, or get the file URL for advanced uses.
Insert Into Your WordPress Page or Post
The last step is to put your Canva design on your WordPress page or post. You have control over where, how big, and how it looks.
Go to the page or post where you want your design. If creating new content, click “Add New” under Pages or Posts. For existing content, select “Edit” on the right item.
Put your cursor where the image should go. Click the “+” block inserter icon (usually at the top left or when you hover between blocks). Type “Image” in the search field or pick the Image block from the common blocks section.
The Image block offers three ways to add visuals. Choose “Media Library” to find your uploaded design. Find your file in the media library grid and click it once to select, then click “Select” or “Insert” to add it to your content.
Before publishing, set up these important image settings:
- Alt text: Add descriptive text in the Image Settings panel for SEO and accessibility (e.g., “Summer sale promotional banner showing 40% discount”)
- Alignment: Pick left, center, right, or wide/full-width based on your layout
- Size: Choose from available sizes or set custom dimensions
- Link settings: Optionally link the image to another page or file
Always add comprehensive alt text to your images. This helps visually impaired users and improves SEO.
Once you’re happy with your image’s placement and settings, click “Update” or “Publish” to make it live on your WordPress site. Preview the page in a browser to check how it looks on different screens.
This method is reliable for single images and gives you full control over quality. While other methods exist, this is the most dependable way to ensure your designs look as intended in Canva.
Using a WordPress Canva Plugin for Direct Integration
A wordpress canva plugin connects your design tools with your publishing platform smoothly. It removes the need for manual file uploads, saving you time. You can edit and publish Canva templates for WordPress right from your admin dashboard.
This method makes your workflow much faster. Our clients have seen their publishing time drop by up to 40%. It keeps your creative flow going by cutting out technical hurdles.
Top Integration Solutions for Your WordPress Site
Look for quality plugins that fit your needs. Canva Button is great for teams needing direct editor access. It lets you start Canva’s design interface from your dashboard and import designs easily.
Embed Canva is different. It lets you embed interactive Canva designs on your pages. This is perfect for presentations and documents that need Canva’s viewer.
Stratum brings Canva-like design into WordPress. It’s ideal for teams wanting to use fewer external tools while keeping design quality high.
When picking a wordpress canva plugin, consider these key points:
- Recent reviews and ratings from users like you
- Update frequency shows if the plugin is actively supported
- Compatibility with your WordPress version and theme
- Specific functionality that fits your workflow (embedding, importing, or editing)
- Performance impact on your site’s speed
The plugin world changes often. Always check the WordPress Plugin Directory for the latest options and info before choosing.
Installation and Initial Setup Process
Installing your plugin is easy. Go to Plugins > Add New from your dashboard. Use the search to find your plugin.
Click Install Now when you find it. WordPress will download and install it for you. After it’s installed, click Activate to start using it.
Setting up the plugin usually involves going to its settings page. You can find this under Settings in your sidebar or as a separate menu item. The exact location depends on the plugin.
It’s a good idea to check all settings during setup. This ensures the plugin works well with your workflow. Pay close attention to file formats, quality settings, and caching options that might affect performance.
Establishing the Connection Between Platforms
Most wordpress canva plugins need API authentication to work. This creates a secure link between your WordPress site and Canva. The process is simple but important for accessing your designs.
Look for a Connect to Canva button in your plugin settings. Clicking this starts the authentication process. You’ll be taken to Canva’s authorisation page to grant permissions.
These permissions usually include:
- Access to view your design library
- Ability to read design properties and metadata
- Permission to download designs in various formats
Click Authorise or Allow Access on Canva’s page. You’ll then return to your WordPress dashboard with the connection set up. This usually takes less than two minutes.
If you have trouble connecting, make sure you’re logged into the right Canva account. Having multiple accounts can cause confusion. Clearing your browser cache can also help with unexpected connection issues.
Streamlined Template Import Workflow
Once connected, importing Canva templates for WordPress is very efficient. Open the page or post where you want to add your design. Look for the plugin’s button in your editor toolbar.
Clicking this button opens your Canva design library in WordPress. You can browse all your designs without leaving your admin interface. This direct import method eliminates the need for manual downloads and uploads.
Select the design you want to use. Most plugins show thumbnail previews to help you pick the right design quickly. Click your chosen design to start the import process.
The plugin handles the technical details for you. It gets the design from Canva, processes it according to your settings, and inserts it into your content. This process takes about 15 seconds per design, much faster than manual methods.
For teams publishing a lot of content, this efficiency adds up quickly. The wordpress canva plugin approach keeps your workflow moving by reducing technical hurdles. You spend more time creating and less time on file transfers.
We’ve set up these systems for content teams publishing 50+ pieces a week. The time savings lead to more output without losing quality. Your creative energy focuses on design and messaging, not technical logistics.
How to Convert Canva Designs to WordPress Using Manual Methods
Manual conversion techniques unlock advanced possibilities for WordPress integration. These methods offer more flexibility than basic exports. They’re perfect when standard exports don’t meet your needs.
Manual methods to convert Canva designs to WordPress aren’t harder. They just need a different approach. Understanding these techniques lets you handle complex content types and control the final result.

Exporting Multi-Page Designs as PDFs
For multi-page documents like ebooks, reports, or presentations, PDF export is the best choice. This format keeps your design across multiple pages in one professional file.
In Canva, you have two PDF options. Choose PDF Standard for documents to download and read digitally. It’s great for online sharing because it’s smaller.
For high-quality print output, pick PDF Print. It meets print-ready specifications. It’s perfect for downloadable resources that people might print.
After downloading your PDF, upload it to your WordPress Media Library. Then, link to it from posts or pages. This lets visitors download or view it. Many WordPress plugins allow direct PDF embedding, showing your content on the page itself.
Recreating Canva Layouts in WordPress Gutenberg Editor
The Gutenberg editor has powerful layout tools that many overlook. Instead of importing designs as static images, extract design principles and rebuild them with WordPress blocks.
This method turns your Canva design into a visual guide. Work on your Canva design on one screen and the Gutenberg editor on another.
Use these native WordPress blocks to recreate your layouts:
- Columns Block: Creates multi-column layouts that mirror Canva’s grid structures
- Cover Block: Adds full-width hero sections with text overlays
- Media & Text Block: Positions images alongside text in balanced layouts
- Group Block: Organises related elements with consistent spacing and backgrounds
This method gives you fully editable, SEO-friendly content instead of static images. Search engines can read your text, visitors can select and copy content, and you have full flexibility for future updates.
The Gutenberg editor also makes your content responsive across all devices. Layouts adjust for mobile screens without extra optimisation work.
Using Page Builders with Canva Templates for WordPress
Page builders like Elementor, Divi, and Beaver Builder offer advanced design capabilities. They’re great for converting Canva designs to WordPress with complex layouts.
We use this workflow for page builder integration:
- Screenshot or keep your Canva design open as a reference
- Launch your page builder’s visual editor in WordPress
- Select layout elements that match your Canva design structure
- Recreate the design using the builder’s drag-and-drop interface
- Fine-tune spacing, colours, and typography to match your original
This method works well for landing pages, service pages, and complex content. You get complete responsiveness and editability that static images can’t offer.
Page builders also have pre-designed sections and templates. These can speed up your process. Many builders offer templates inspired by modern design trends similar to Canva’s aesthetic.
Extracting Text and Images Separately
For blog posts and article content, separating text from images is best for SEO. This approach combines Canva’s visual appeal with WordPress’s SEO strengths.
Start by copying all text content from your Canva design. Paste it into WordPress text blocks where search engines can index every word. This makes your content searchable and selectable for readers.
Next, export visual elements separately as individual images. Download any graphics, icons, or decorative elements that enhance your content but don’t contain essential text.
Position these images strategically throughout your WordPress post using image blocks. This creates visual interest while keeping the SEO benefits of actual text.
We often recommend this method for clients who want professionally designed content that ranks well in search results. It combines visual appeal from Canva and SEO performance from WordPress.
Each manual method serves specific purposes depending on your content goals. Choose the right method for your project. The extra effort pays off in functionality, performance, and professional results.
Publishing Specific Content Types from Canva to WordPress
When you create visual content in Canva, you need to think about how it will look on WordPress. We’ve helped many businesses get their content from Canva to WordPress. Knowing how different types of content work on your site makes a big difference.
What you make most often will change how you design. Knowing what you need before you start saves time and trouble later.
Transferring Social Media Graphics and Promotional Content
Social media graphics need to be the right size for WordPress. A square image for Instagram might not work for a blog post. Blog posts usually need a landscape format of around 1200×630 pixels.
It’s better to make WordPress-specific versions of your social graphics. This way, your promotional content looks good everywhere.
Save these graphics as JPGs for faster loading. Place them in posts to encourage sharing and keep things looking good.
Here are some tips for adapting social content:
- Create separate Canva designs for WordPress instead of just using social posts
- Keep your brand consistent across all platforms, adjusting sizes as needed
- Include small branding elements that are easy to spot when resized
- Check how graphics look on mobile devices before you’re done
- Keep file sizes under 200KB for the best performance
Creating Blog Post Featured Images and Thumbnails
Featured images are key for your blog posts. They show up in archives, search results, and social shares. Stick to 1200×630 pixels for consistency across most themes.
These images should grab attention and show what the article is about. Always include your brand subtly.
First impressions matter with featured images. Here’s how to make them count:
- Use colours that pop in crowded feeds
- Include text overlays that sum up the post
- Keep a consistent style for brand recognition
- Export as JPG for quality and speed
- Test thumbnails at small sizes for clarity
Having a featured image template in Canva makes things easier. Create a master design with placeholders, then customise each post.
Publishing Infographics and Data Visualisations
Infographics are tall and detailed, so they’re tricky. Export them as high-resolution PNGs at least 1200 pixels wide for clear text on all devices.
Use full-width image blocks for infographics. This way, readers can see all the details without squinting.
Write a summary or key takeaways in WordPress text below the infographic. This helps search engines and reinforces your message.
Here are some tips for infographics:
- Export at 2x resolution for high-DPI displays
- Break long infographics into sections for easier reading
- Include data sources and citations in the WordPress text
- Compress PNG files before uploading
- Offer a downloadable PDF version for saving or printing
Implementing Website Headers, Banners and Hero Images
Website headers, banners, and hero images need the biggest sizes and highest quality. Use 1920×1080 or larger, as high-quality JPGs, to balance quality and size.
These images are critical first impressions. We never compromise on quality for these important spots.
Most WordPress themes have special areas for hero images. Check your theme’s documentation for exact sizes before designing. This avoids frustrating rework.
For banners in sidebars or content areas, make them eye-catching but not too big. We usually keep them under 400 pixels wide to keep the layout balanced.
Here are some technical requirements:
| Content Type | Recommended Dimensions | Export Format | Maximum File Size |
|---|---|---|---|
| Hero Images | 1920×1080 pixels | JPG (90% quality) | 300-500KB |
| Header Banners | 1200×400 pixels | JPG (85% quality) | 200-300KB |
| Sidebar Banners | 300×600 pixels | JPG or PNG | 100-150KB |
| In-Content Banners | 728×90 or 970×250 pixels | JPG or PNG | 150-200KB |
Knowing how each content type works in WordPress helps you design better from the start. This approach avoids technical problems and makes sure every visual element does its job well.
Optimising Canva Content for WordPress Performance and SEO
Optimising your Canva content for WordPress is key. It’s the difference between designs that work and those that don’t. Beautiful visuals are important, but they must not slow down your site or miss the mark with search engines. We make sure image optimisation is a must in every publishing process.
Your website’s speed affects user experience, search rankings, and business success. A one-second delay can cut conversions by 7%. So, we focus on speed as much as on looks.
Compressing Images Without Losing Quality
Compressing images reduces file sizes while keeping quality high. We often cut file sizes by 50-80% without losing quality. This is thanks to smart algorithms.
The best tools remove extra data and tweak colour profiles. TinyPNG, ShortPixel, and Imagify are our top picks for Australian businesses looking for reliable results.
| Compression Tool | Integration Type | Average Compression | Best Feature |
|---|---|---|---|
| TinyPNG | Web-based & API | 60-70% | Smart lossy compression |
| ShortPixel | WordPress plugin | 50-80% | Automatic on upload |
| Imagify | WordPress plugin | 55-75% | Bulk optimisation |
| WP Smush | WordPress plugin | 45-65% | Free tier available |
We suggest using WordPress plugins that compress images on upload. This makes the process easy and consistent.
Target file sizes we follow: under 200KB for standard images and under 500KB for hero images. These sizes are perfect for Australian internet speeds.
Adding Alt Text and SEO Metadata
Alt text is vital for accessibility and SEO. Every image should have clear, descriptive alt text.
Write alt text that tells what the image shows and its relevance to your content. “Infographic showing five steps to improve website speed” is much better than just “infographic”.
Alt text is not just for SEO—it’s essential for web accessibility. It benefits all users and boosts search visibility.
We include relevant keywords in alt text but avoid overdoing it. The description should make sense when read aloud by screen readers.
Add alt text immediately after uploading images to WordPress through the image block settings or media library. This habit ensures your SEO strategy is complete and meets accessibility standards.
Ensuring Mobile Responsiveness and Fast Loading
Mobile responsiveness is a must today. Over 60% of Australian web traffic comes from mobiles, making mobile optimisation key.
We test every visual element on various screen sizes using browser developer tools or services like BrowserStack. This catches issues before visitors see them.
Key mobile considerations we check:
- Images don’t break page layouts on smaller screens
- File sizes remain appropriate for mobile connections
- No horizontal scrolling occurs on any device
- Touch targets remain accessible and appropriately sized
Most WordPress themes handle responsive scaling automatically, but we always check. We’ve seen many sites where beautiful Canva designs looked great on desktop but were a problem on mobile.
Using Lazy Loading for Visual Content
Lazy loading delays image loading until users scroll to them. This improves initial page load times a lot. It focuses on content that visitors see first.
WordPress 5.5 and later has native lazy loading. But we use plugins like a3 Lazy Load or WP Rocket for more control and better performance.
Enable lazy loading for all images except those immediately visible on page load. Loading above-the-fold images lazily can cause delays that annoy visitors.
We set lazy loading thresholds to start loading images a bit before users scroll to them. This balance ensures smooth experiences without loading too much content.
These optimisation practices make sure your Canva content improves your WordPress site’s performance. Investing in proper optimisation leads to better user experience, higher search rankings, and more conversions.
Troubleshooting Common Canva to WordPress Transfer Issues
Transferring content from Canva to WordPress can sometimes cause problems. But, most of these issues are easy to fix without needing an expert. We’ve solved many technical problems during transfers, and the solutions are often simple and repeatable.
Understanding the causes of common issues helps you fix them quickly. Once you know where to look and what to adjust, troubleshooting becomes easy.
Fixing Image Quality Loss During Export
Many content creators complain about image quality loss. This usually happens when export settings aren’t right or when WordPress compresses images too much.
Always export at maximum quality settings from Canva as a first step. Go to the download options and pick the highest quality for your file format. PNG files are better for graphics with text or sharp edges.
WordPress and many hosts compress images to save space. This can make image quality worse, affecting detailed designs or infographics.

- Export designs at 2x their intended display size to avoid compression issues
- Use quality-preserving tools like ShortPixel or Imagify before uploading
- Disable automatic image compression in your hosting control panel to find the source
- Check your theme’s image processing settings for aggressive compression options
- Upload original files via FTP if WordPress compresses too much during standard uploads
Exporting at higher resolution usually solves most image quality problems. The extra file size is small compared to the visual improvement.
Resolving Sizing and Alignment Problems
Sizing and alignment issues can be frustrating. They often happen when graphics appear stretched, cropped, or misaligned on WordPress sites. These problems usually come from dimension mismatches between your export and your theme’s specifications.
Make sure your export dimensions match your theme’s requirements before uploading. Most WordPress themes have specific sizes for featured images, content images, and hero banners.
WordPress automatically creates multiple image sizes when you upload files. Go to Settings > Media to review and adjust these default sizes. We usually set these to match our most common design sizes:
| Image Type | Recommended Width | Common Use Case | Canva Export Setting |
|---|---|---|---|
| Thumbnail | 150-300px | Blog previews, sidebar widgets | Standard quality PNG |
| Medium | 600-800px | In-content images, galleries | High quality PNG/JPG |
| Large | 1200-1600px | Featured images, hero sections | Maximum quality PNG |
| Full Width | 1920px+ | Full-screen backgrounds | Maximum quality, 2x size |
For alignment issues, the Gutenberg editor offers precise control. Select your image block and choose from left, centre, right, wide, or full alignment. We use “wide” for hero images and “centre” for standard content images.
If images exceed your theme’s content width, they might be cropped or cause horizontal scrolling. Check your theme’s content width settings and ensure your Canva designs don’t go over that.
Addressing Font Rendering and Colour Discrepancies
Font rendering differences between Canva’s preview and your WordPress page can be a concern. This isn’t a problem with your export—it’s usually a monitor calibration or browser rendering variation.
Canva designs export as images, so the text becomes part of the graphic file. Exporting at high resolution ensures consistent font rendering across all devices and browsers.
We always preview published content on multiple devices to check consistency. What looks different on your design monitor often looks perfect on standard displays.
Colour discrepancies are a more technical challenge. These variations usually come from colour space differences between design software and web browsers.
Canva exports using sRGB colour space by default, which is standard for web content. If colours look different after publishing, consider these factors:
- Monitor calibration affecting how you perceive colours during design
- Browser rendering variations between Chrome, Firefox, and Safari
- Device screen settings impacting colour display
- Theme CSS affecting image display properties
We recommend designing with web-safe colours and checking your published designs on multiple devices before finalising. This approach catches colour inconsistencies early in your workflow.
Dealing with File Size and Upload Limitations
Upload limitations can frustrate content creators when WordPress rejects their designs. These restrictions come from your hosting provider, not WordPress itself.
Most shared hosting plans set upload limits between 2MB and 64MB. You’ll see an error message if your file exceeds this threshold.
Compress your images more aggressively if you hit upload limits. Tools like TinyPNG or Compress JPEG can reduce file sizes by 50-80% while keeping quality good for web display.
For persistent upload limits, we use these alternative approaches:
- Contact your hosting provider to increase the PHP upload limit (usually configurable in php.ini or .htaccess)
- Upload large files directly via FTP to your /wp-content/uploads/ folder
- Use media import plugins like “Add From Server” to register FTP-uploaded files in your WordPress media library
- Switch to cloud storage solutions like Cloudinary for extremely large media files
We rarely find sizing issues that can’t be fixed through compression or hosting adjustments. Most hosting providers will increase upload limits upon request, even for business hosting plans.
Keep file sizes reasonable as a best practice. Even if your hosting allows 100MB uploads, larger files slow down your website performance and frustrate visitors on slower connections.
Advanced Strategies for Streamlining Your Workflow
Advanced workflow strategies boost your content production efficiency while keeping quality high. We’ve honed our methods to turn Canva-to-WordPress publishing into a key advantage. These advanced methods help businesses use design tools for growth, not just for design.
Good content operations come from systematic implementation of proven techniques. Strong workflows mean every team member knows their role. This reduces errors and speeds up publishing.
Building Reusable Canva Templates for Your WordPress Site
Creating canva templates for wordpress is key to an efficient design system. We suggest making master templates for all your site’s content types. This includes blog images, quotes, banners, social media, and category visuals.
Each template should have your brand’s elements set. This means your colours, fonts, logo, and spacing are always right. This saves up to 80% of design time compared to starting from scratch.
Organising templates is vital. Use Canva folders for different content types. Label each template clearly so team members know its purpose.
For new content, just duplicate the right template and change what you need. This keeps your master templates safe while allowing many variations. We guide everyone on using templates to keep things consistent.
Automating Your Content Publishing Process
Workflow automation takes efficiency further. Tools like Zapier connect Canva to WordPress, making publishing easy. We’ve set up systems where designs publish automatically when ready.
Tagging systems are a powerful automation tool. Add tags to designs or move them to folders to trigger publishing. Designs upload, attach to posts, and get captions or metadata.
Scheduling plugins add more automation. Tools like CoSchedule or Editorial Calendar plugins let you plan content weeks ahead. We use these with Canva exports for hands-off publishing.
- Automatic social media graphic publishing when new designs complete
- Scheduled blog featured image updates coordinated with post publication dates
- Batch processing workflows that handle multiple designs simultaneously
- Notification systems alerting team members when manual review is needed
Setting up these automations pays off right away. What took 30 minutes now happens in seconds, without your effort.
Maintaining Brand Consistency Across All Content
Brand consistency needs a systematic approach, not just memory. We create detailed brand guidelines for every team member. These documents have colour codes, typography, and logo rules.
Typography is critical in your guidelines. Specify font combinations, sizes, and spacing. This eliminates design guesswork and keeps your brand consistent.
Logo usage rules prevent branding mistakes. Define clear space, background colours, sizes, and what not to do. We include examples to avoid confusion.
| Brand Element | Specification Required | Why It Matters | Implementation Method |
|---|---|---|---|
| Colour Palette | HEX codes, RGB values, usage hierarchy | Ensures visual recognition across all platforms | Save as Canva brand kit, document in style guide |
| Typography | Font families, sizes, weights, line spacing | Creates consistent readability and professional appearance | Set default text styles in templates, document combinations |
| Logo Standards | Clear space, minimum sizes, colour variations | Maintains brand integrity and recognition | Provide logo files in multiple formats with usage rules |
| Image Style | Photography style, filters, composition guidelines | Creates cohesive visual language | Curate example images, specify approved sources |
Regular brand audits keep standards high. We review content monthly, update guidelines as needed. This keeps your brand consistent as it evolves.
Creating a Content Calendar That Works
Strategic planning is key to good content. A well-organised content calendar shows what’s coming, prevents last-minute rushes, and keeps publishing regular. This is what your audience expects.
We use tools like Trello, Asana, or WordPress plugins to plan content. Each entry shows the content type, Canva design, publish date, and who’s responsible. This clarity stops confusion.
Planning horizon is important for efficiency. Keep at least two weeks of content planned for regular posts. Big campaigns need six to eight weeks for design and approval.
Your content calendar should link to your template library. When planning a blog post, the calendar entry links to the right Canva template. This makes creating content smoother.
- Weekly content reviews ensure you’re tracking toward publication goals
- Buffer content slots accommodate unexpected opportunities or delays
- Theme clustering groups related content for cohesive campaigns
- Performance tracking links calendar entries to analytics for continuous improvement
Collaborative calendars improve team coordination. Everyone sees what’s coming, so designers can work ahead. Writers know what visuals they need. Social media managers can plan promotions.
These advanced strategies work together. Reusable templates feed automated workflows. Brand guidelines keep calendar content consistent. Together, they make your Canva-to-WordPress process a strategic asset for growth and engagement.
When to Seek Professional Help with Your Canva Customisation
Knowing when to ask for professional help can save you a lot of time and stress. We help businesses manage their content on their own. But sometimes, expert help is better than trying to do it yourself.
Most canva wordpress integration projects work well with the methods we’ve shared. But some situations really need professional help more than trying again and again.
Complex Integration Requirements
Some integration needs are too much for standard plugins and manual methods. If you need automated processes that start based on certain conditions, you’re beyond basic setup.
Custom API integrations that link Canva brand kits with WordPress theme settings are another level of complexity. These systems keep your design elements consistent across platforms without needing manual updates.
Multi-site deployments where Canva content publishes across many WordPress sites at once are technical challenges. We check if your team can handle these needs and if you’re short on time.
Consider custom development when you need:
- Conditional publishing workflows that send content based on design attributes or metadata
- Real-time synchronisation between Canva brand assets and WordPress design elements
- Enterprise-scale deployments managing dozens of WordPress sites from centralised Canva templates
- Integration with existing systems like CRM platforms or marketing automation tools
Investing in professional help often pays off in months through efficiency gains. The time saved on manual workarounds adds up quickly for your team.
Custom Plugin Development Needs
Existing plugins might not meet your specific business needs. Custom development is a good choice when standard solutions don’t fit.
Maybe you want a plugin that automatically adds your brand watermark to Canva images during WordPress import. Or one that creates multiple size variations for different page locations.
We’ve created custom solutions for clients where standard plugins couldn’t meet their needs. These investments provide long-term value because they’re tailored for your workflows.
Custom plugin development scenarios include:
- Automated brand compliance features that enforce design standards during import
- Intelligent image processing that generates responsive variations automatically
- Advanced metadata handling that preserves Canva design information in WordPress
- Team workflow management with approval processes before publishing
The question is whether the efficiency gains are worth the development costs. For high-volume content operations, custom solutions usually pay off.
Getting Developer Support for Advanced Customisation
Developer support is for scenarios beyond the initial setup and integration. Advanced customisation involves integrating Canva content with custom post types, creating specialised workflows for WooCommerce product images, or building administrative interfaces.
Non-technical team members often need simple interfaces for managing complex publishing rules. Professional developers create these user-friendly systems while keeping the technical side sophisticated.
Custom post type integration allows Canva designs to automatically populate portfolio items, team member profiles, or product catalogues. This level of integration requires understanding both WordPress architecture and Canva’s capabilities.
If you’re struggling with your Canva customisation or integration challenges, we’re here to help. Contact hello@defyn.com.au, and we’ll discuss your specific requirements, technical constraints, and business objectives.
Our team has extensive experience bridging design tools like Canva with WordPress environments. We can quickly assess whether you need simple troubleshooting guidance, workflow consulting, or full custom development.
We’ve helped Australian businesses across industries implement sophisticated canva wordpress integration workflows. These would have taken internal teams months to develop. Our approach focuses on understanding your goals first, then recommending the most efficient solution.
Professional help isn’t a sign of failure—it’s a strategic choice. You focus on core business activities while leveraging specialist expertise where it delivers maximum value.
The right time to seek developer support is before you’ve invested weeks in unsuccessful attempts. Early consultation often prevents costly mistakes and identifies simpler solutions you might not have considered.
Conclusion
We’ve looked at many ways to make your content publishing smoother. From simple image exports to complex plugin setups, each has its own benefits. The most important thing is to pick the best method for you and keep improving it.
Your workflow should have a few key parts: the right image formats, consistent designs, good SEO, and checking how things are going. Begin with easy steps and grow your skills as you get more confident. For Australian businesses, mastering how to move content from Canva to WordPress is a big plus.
We’re here to help you get better at publishing content. Try out different ways, see how they work, and change your approach as needed. If you hit a snag or need special help, experts can guide you and save you from mistakes.
Your success is important to us. Use these strategies well, keep quality high, and your content making will get better and faster. The tools and methods you’ve learned will help your business grow online.
FAQ
Can I directly publish from Canva to WordPress without downloading files?
What’s the best image format to export Canva to WordPress website?
How do I maintain image quality when transferring designs from Canva to WordPress?
Can I use Canva templates for WordPress directly, or do I need to modify them?
What are the recommended image dimensions for different WordPress content types?
How do I import Canva to WordPress using plugins?
Can I convert Canva designs to WordPress for complex layouts and multi-page documents?
How do I optimise Canva images for WordPress site speed?
What should I do if my Canva images look different after uploading to WordPress?
Can I automate the process of publishing Canva content to WordPress?
How do I add alt text and SEO metadata to images imported from Canva?
What file size limitations should I be aware of when uploading Canva designs to WordPress?
Can I maintain brand consistency when transferring multiple designs from Canva to WordPress?
Do I need Canva Pro to effectively publish content to WordPress?
How do I ensure my Canva designs are mobile-responsive when published to WordPress?
Can I embed interactive Canva designs directly into WordPress pages?
What’s the best workflow for teams managing multiple content creators using Canva and WordPress?
When should I contact a developer for help with Canva to WordPress integration?
Insights
The latest from our knowledge base