Webflow Development with Animations

Table of Content
Creating a stunning website that captivates your audience is now within reach, thanks to the revolutionary visual development capabilities of modern web design platforms.
At the forefront of this innovation is a platform that empowers businesses to build professional, custom websites without the need for extensive coding knowledge. We understand the challenges of customising your website, and we’re here to help – feel free to contact us at hello@defyn.com.au if you’re struggling with your webflow customisation.
By combining powerful visual design tools with professional code generation capabilities, this platform has transformed the way we approach web development. In this comprehensive guide, we’ll walk you through everything you need to get started with creating dynamic, engaging websites that bring your vision to life.
Key Takeaways
- Discover how to leverage visual development for creating stunning websites.
- Learn the basics of building custom websites without extensive coding.
- Understand how to bridge the gap between design and development.
- Explore advanced animation techniques for dynamic web experiences.
- Get started with mastering the development process for your business needs.
Understanding Webflow’s Visual Development Platform
With Webflow, the power of code is put into a visual canvas, enabling teams to craft stunning websites quickly. This approach allows designers and developers to work together more effectively, creating a seamless transition from design to development.
What Makes Webflow Different
Unlike traditional coding methods or simple drag-and-drop website builders, Webflow provides a unique platform that offers both creative freedom and technical precision. This distinction is crucial in understanding how Webflow bridges the gap between designers and developers.
| Feature | Traditional Coding | Webflow |
|---|---|---|
| Creative Freedom | Limited by manual coding | High, with visual canvas |
| Technical Precision | High, with manual control | High, with generated code |
| Development Speed | Slow, due to manual coding | Fast, with visual tools |
The Visual Canvas and Code Generation
Webflow’s visual canvas allows users to design and develop websites without writing code. As users drag, drop, and style elements, Webflow generates professional-grade code that follows best practices. This process enables the creation of custom, responsive designs without the need for manual coding.
By leveraging Webflow’s visual development platform, businesses can accelerate their web design and development process while maintaining high standards of quality and professionalism.
Getting Started with Webflow Development
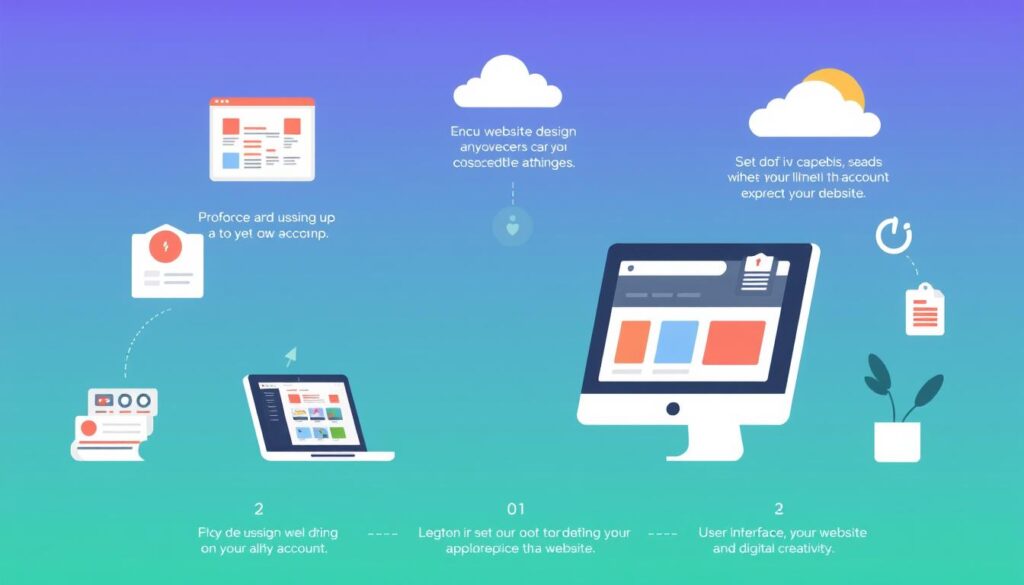
Webflow development is an exciting venture, and the first step is setting up your account to unlock its full potential. We guide you through the initial steps, from creating your account to understanding the subscription options available.

Setting Up Your Webflow Account
To start using Webflow, sign up for a free account at webflow.com. This allows you to create projects and access the Webflow University learning resources. Completing the Webflow 101 crash course is a great next step.
Navigating the Webflow Designer Interface
Once your account is set up, you’ll need to navigate the Webflow Designer interface. This includes understanding the key panels, tools, and features that you’ll use regularly in your web development process. Familiarity with the interface is crucial for efficient website creation.
Essential Resources for Beginners
Webflow University is an invaluable resource for designers and developers alike. It offers tutorials, courses, and documentation for users at all skill levels. We recommend starting with small projects to build confidence before tackling more complex websites.
If you’re struggling with your Webflow customisation, our team at hello@defyn.com.au can provide expert assistance.
Core Components of Webflow Development
To fully leverage Webflow’s capabilities, it’s essential to understand its core components that facilitate efficient web development. Webflow’s ecosystem is built around three primary elements that work in harmony to simplify the process of creating, managing, and deploying websites.
The Designer: Visual Development Environment
The Designer is Webflow’s visual development environment where you’ll spend most of your time building. It combines the creative freedom of design tools like Figma or Sketch with the structural capabilities of coding environments, allowing for visual development without the need for manual coding.
CMS: Content Management System
Webflow’s CMS allows you to create custom content structures, known as Collections, which can be dynamically displayed throughout your site. This separation of content from design makes it easier to update and maintain large websites, enhancing your content management capabilities.
Hosting and Publishing Infrastructure
Webflow’s hosting and publishing infrastructure is built on Amazon Web Services and Fastly CDN, providing enterprise-grade reliability and performance. This robust infrastructure ensures that your websites are not only visually appealing but also highly performant and scalable.
Understanding these core components is crucial for leveraging Webflow’s full potential and creating sophisticated, scalable websites. By mastering the Designer, CMS, and hosting infrastructure, you can streamline your development process from design to deployment, making the most of Webflow’s development capabilities.
Building Responsive Layouts in Webflow
Webflow empowers designers to craft layouts that adapt to any screen size effortlessly. Its responsive design system allows for real-time previews across different devices, ensuring a consistent user experience. We will explore how to leverage Webflow’s capabilities to create flexible and stable layouts.
Understanding the Box Model and Flexbox
The box model and Flexbox are fundamental to building responsive layouts. The box model defines the structure and spacing of elements, while Flexbox enables flexible arrangements. Understanding these concepts is crucial for creating layouts that adapt to various screen sizes.
Creating Mobile-Friendly Designs
Designing for mobile devices first ensures a better user experience across all devices. We will discuss how to create mobile-friendly designs using Webflow’s responsive design features. This approach helps in prioritising content and ensuring that the layout is flexible.
Testing Across Multiple Device Breakpoints
Testing is crucial to ensure that responsive layouts perform consistently across different devices. We’ll cover how to use Webflow’s breakpoint system to test and refine your designs for various screen sizes, ensuring a seamless user experience.
| Device Breakpoint | Screen Size | Design Considerations |
|---|---|---|
| Mobile | < 768px | Prioritise content, simplify navigation |
| Tablet | 768px – 1024px | Adjust layout for larger screens, add more content |
| Desktop | > 1024px | Enhance layout with more features, ensure consistency |
Mastering Webflow Animations

Webflow’s animation capabilities allow you to create sophisticated motion effects without coding. This feature is particularly useful for enhancing user experience and engagement on your website. By leveraging Webflow’s visual development platform, you can bring your designs to life with dynamic animations.
Introduction to the Interactions Panel
The Interactions panel is the central hub for all animation work in Webflow. It provides a visual interface for creating both simple and complex animations. With this panel, you can design and preview animations in real-time, making it easier to achieve the desired effect.
Trigger Types and Animation Options
Webflow offers various trigger types, including click, hover, scroll, and page load events, which can initiate animations. You can explore the extensive animation options available, from basic transitions to complex multi-step sequences. This flexibility allows you to create unique and engaging interactions that enhance your website’s overall user experience.
Creating Timeline-Based Animations
Timeline-based animations give you precise control over how elements move, transform, and change over time. This feature is similar to professional animation software, allowing you to create complex animations with ease. By mastering timeline-based animations, you can add a new level of sophistication to your web development projects.
Advanced Animation Techniques in Webflow
As we dive deeper into Webflow development, mastering advanced animation techniques becomes crucial for creating engaging user experiences. Advanced animations can significantly enhance the interactivity and visual appeal of your web projects, setting them apart from more static sites.
Scroll-Based Animations
Scroll-based animations create engaging experiences as users navigate through your content, with elements animating in response to scroll position. This technique can be particularly effective in storytelling and guiding users through complex information. By leveraging Webflow’s interactions panel, you can create sophisticated scroll-based animations that captivate your audience.
Multi-Step Animations and Sequences
You’ll learn how to create sophisticated multi-step animations and sequences that can tell stories and guide users through complex information. These animations can be triggered by various interactions, such as clicking or hovering, and can be fine-tuned to enhance the overall user experience. By breaking down complex animations into manageable steps, you can create a more engaging and dynamic web experience.
Performance Optimisation for Complex Animations
One of the most common mistakes beginners make is creating overly complex animations that can hurt performance and accessibility. We’ll emphasise the importance of performance optimisation when working with complex animations to ensure your site remains fast and responsive. By balancing creative animation effects with technical performance considerations, you can achieve optimal results without compromising the user experience.
If you’re struggling with implementing advanced animations in your Webflow project, our team at hello@defyn.com.au can provide expert assistance. We can help you balance creative vision with technical performance to create a seamless and engaging web experience.
Implementing Micro-Interactions for Better UX
Micro-interactions are the subtle yet powerful elements that can significantly enhance the user experience on your Webflow sites. These small, purposeful animations provide immediate feedback to users, making interactions feel more intuitive and engaging.
We explore how micro-interactions can elevate the overall web design of your sites. By incorporating these elements, you can create a more dynamic and responsive interface that delights users.
Button and Hover States
Button and hover states are fundamental micro-interactions that provide visual feedback to users, confirming that elements are interactive. By designing these states thoughtfully, you can enhance the usability of your site.
Form Field Interactions
Engaging form field interactions guide users through the input process, reducing errors and frustration. We show you how to create these interactions in Webflow to improve form completion rates.
Loading and Progress Animations
Loading and progress animations make wait times feel shorter, keeping users engaged during necessary delays. These animations can be particularly useful for enhancing the user experience on content-heavy Webflow sites.
By implementing these micro-interactions efficiently in Webflow, you can create a polished, professional experience that users subconsciously appreciate, without compromising site performance or accessibility. This approach to content webflow development ensures a seamless and engaging user journey.
Best Practices for Clean Webflow Development
Effective Webflow development requires a combination of design expertise and technical know-how. To maintain a clean and efficient workflow, we need to focus on several key areas. By implementing these best practices, we can ensure our Webflow projects are both visually appealing and technically sound.
Class Naming Conventions and Organisation
Adopting consistent class naming conventions is crucial for keeping styles organised and preventing conflicts. We recommend following a methodology like BEM (Block Element Modifier) or Webflow’s Client-First approach. This ensures our styles are maintainable and scalable as our project grows.

Component-Based Design with Symbols
Building reusable components using Webflow’s Symbols feature dramatically improves consistency across our project. By creating a library of Symbols, we can make site-wide updates much simpler and reduce the risk of design inconsistencies. This approach also streamlines our design process.
Optimising for Performance and Speed
Optimising our Webflow sites for performance and speed is critical for providing a smooth user experience. We can achieve this by optimising images, leveraging Webflow’s built-in performance features, and minimising complex animations. By doing so, we ensure our sites load quickly across all devices.
Integrating Custom Code with Webflow

Custom code integration is a powerful tool in Webflow development, allowing for advanced functionality and tailored solutions. While Webflow is a robust platform, there are instances where custom code is necessary to achieve specific goals beyond its native capabilities.
When and How to Use Custom Code
Understanding when to use custom code versus native Webflow solutions is crucial for efficient web development. Custom code is ideal for complex interactions or when integrating third-party services.
JavaScript Integration for Advanced Functionality
Adding JavaScript to your Webflow projects enables advanced functionality while maintaining site stability. This integration is key to enhancing user experience without compromising performance.
Third-Party Libraries and APIs
Integrating third-party libraries and APIs with Webflow expands its capabilities, connecting your site with external services and enhancing its tech stack. If you’re struggling with complex code integration, our team at hello@defyn.com.au specialises in custom Webflow development.
Webflow CMS and Dynamic Content
Webflow’s Content Management System (CMS) is designed to handle complex content needs, allowing developers to create custom content structures that can be dynamically displayed throughout a site. This separation of content from design makes it easier to update and maintain large websites.
The Webflow CMS offers several key features, including custom content types with flexible fields, dynamic content filtering and sorting, and reference fields to connect related content. These features enable the creation of sophisticated content models that can be tailored to specific project requirements.
Creating Custom Collections
Custom collections in Webflow allow you to create content structures that perfectly match your needs. With flexible field types for text, images, references, and more, you can design collections that fit your content strategy. This flexibility is crucial for managing diverse content types within a single platform.
Dynamic Pages and Templates
Dynamic pages and templates in Webflow enable the creation of consistent layouts that automatically populate with CMS content. This feature streamlines the process of generating multiple pages with similar structures but different content, enhancing efficiency and consistency across the site.
Filtering and Sorting Content
Implementing filtering and sorting functionality in Webflow allows users to find specific content easily. By leveraging the CMS’s dynamic filtering capabilities, you can create user-friendly interfaces that enhance the overall user experience and make content more accessible.
By utilising Webflow’s CMS, developers can bridge the gap between powerful content management and visual design. This integration gives both content creators and designers the tools they need to produce and manage high-quality content effectively. Separating content from design with the CMS makes websites significantly easier to maintain and update over time.
Real-World Examples of Stunning Webflow Animations
Webflow’s built-in tools enable the creation of stunning animations that captivate users on business websites and e-commerce platforms alike. These animations are not just aesthetically pleasing; they serve to enhance user experience and engagement. By examining real-world examples, we can gain insights into how Webflow’s capabilities are being utilised to create memorable digital experiences.

Case Study: Business Websites with Engaging Animations
Business websites can leverage subtle, purposeful animations to guide users through content and highlight key information. For instance, animations can be used to draw attention to calls-to-action or to create a seamless transition between pages. This enhances the overall user experience and can lead to increased conversion rates.
Case Study: Portfolio Sites with Creative Interactions
Portfolio sites benefit greatly from Webflow’s ability to create complex animations and custom interactions. Designers can showcase their work in unique and engaging ways, creating immersive experiences that stand out. This not only demonstrates their creativity but also provides a compelling narrative for their portfolio.
Case Study: E-commerce Experiences Enhanced by Animation
E-commerce sites can also benefit from Webflow animations, particularly in product showcases and checkout processes. By creating smooth, intuitive animations, businesses can enhance the shopping experience, making it more enjoyable and engaging for customers. This can lead to increased customer satisfaction and loyalty.
These case studies demonstrate the versatility and power of Webflow’s animation capabilities in various contexts, from business websites to e-commerce platforms and portfolio sites. By leveraging these features, designers and developers can create custom layouts that are both visually stunning and highly functional, showcasing the potential of Webflow in modern web design.
Troubleshooting Common Animation Issues
Common animation issues in Webflow can be addressed by understanding the root causes and applying practical solutions. Animations can significantly enhance the user experience, but they can also introduce problems if not implemented correctly.
Some common issues include:
- Animation timing problems that can make interactions feel awkward or unprofessional.
- Mobile compatibility issues that can cause animations to malfunction on certain devices.
- Complex interaction chains that can be difficult to debug.
Fixing Animation Timing Problems
Adjusting the duration, easing, and delay settings can resolve animation timing problems. Proper timing is crucial for creating a seamless user experience.
Resolving Mobile Compatibility Issues
To ensure that animations work beautifully across all devices, we need to test and optimise them for different screen sizes and devices. Mobile compatibility is essential for delivering a consistent user experience.
Debugging Complex Interaction Chains
Debugging complex interaction chains requires a systematic approach. We can use Webflow’s built-in debugging tools to identify and fix issues. If you’re struggling with persistent animation issues, our team at hello@defyn.com.au can provide expert assistance.
Conclusion: Taking Your Webflow Development Skills Further
As we conclude our journey through Webflow development with animations, it’s clear that this platform offers unparalleled flexibility for web designers and developers alike. You’ve learned how to harness the power of Webflow’s visual development environment to create custom websites with sophisticated animations, bridging the gap between design and development.
To further enhance your skills, we recommend exploring Webflow University and participating in community forums. If you encounter challenges with your Webflow customisation, our team at hello@defyn.com.au is ready to provide expert assistance. By mastering Webflow development, you’ll be able to create professional, custom websites without traditional development bottlenecks, making it an invaluable addition to your professional tech stack.


